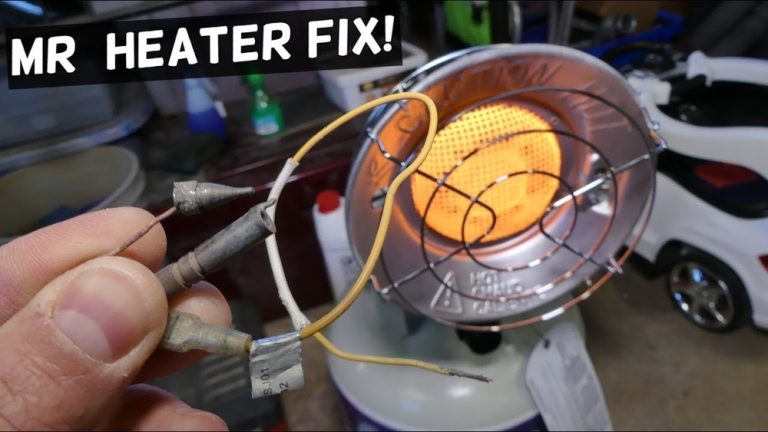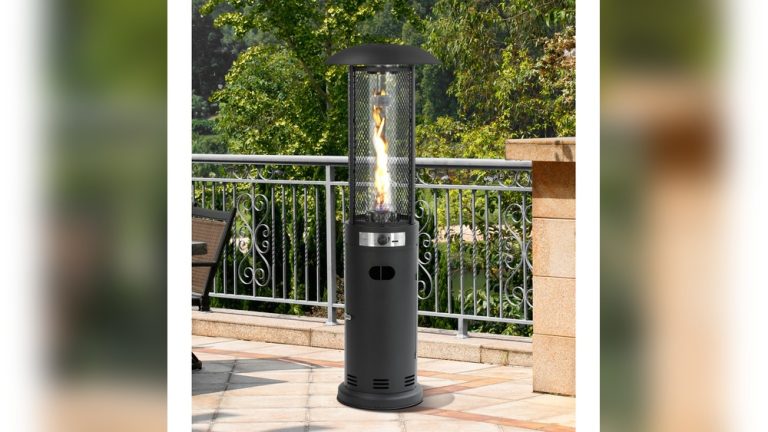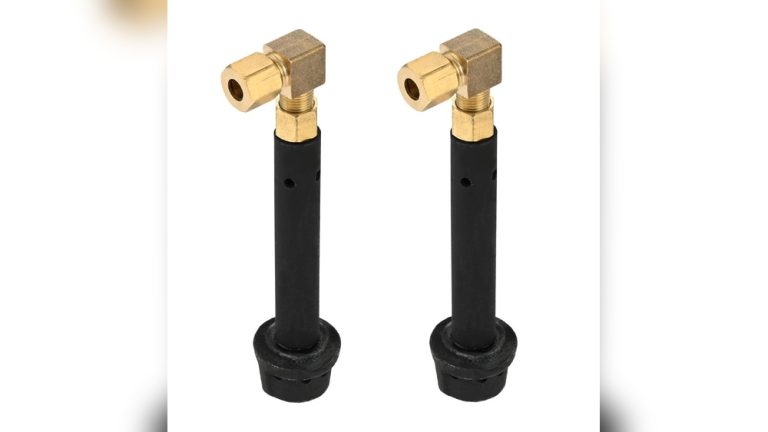
Is your patio heater acting up and leaving you in the cold? If your heater won’t stay lit or feels unreliable, the problem might be with the thermocouple.
Don’t worry—understanding and fixing this small but important part can save you time, money, and frustration. In this guide, you’ll discover simple ways to troubleshoot your patio heater thermocouple, so you can enjoy warmth outside without hassle. Keep reading to find easy steps that anyone can follow to get your heater working smoothly again.
Common Thermocouple Issues
The thermocouple is a small but vital part of your patio heater. It controls the gas flow and ensures safe operation. Problems with the thermocouple can stop your heater from working properly. Understanding common issues helps you fix them quickly. Below are some frequent problems linked to the thermocouple.
No Heat Production
No heat means the thermocouple might not sense the flame. It could be dirty or damaged. Dirt blocks the heat signal. Damage can stop the thermocouple from working. Check for soot or cracks. Clean gently with steel wool or a soft cloth. Replace if broken. A cold thermocouple cannot open the gas valve. This stops gas flow, so no heat is produced.
Intermittent Flame
A flame that flickers or goes out often points to a loose thermocouple. The connection may be weak or dirty. Tighten the screws and clean the contact points. A bad thermocouple sensor might also cause this. Worn parts cannot keep the flame steady. Test the thermocouple with a multimeter. Replace it if readings are low or unstable.
Pilot Light Won’t Stay Lit
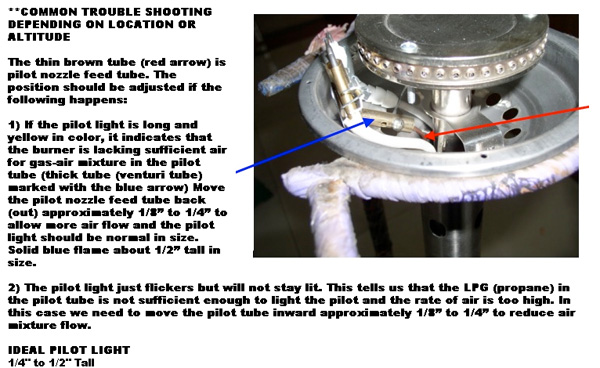
The pilot light going off is a common thermocouple issue. It means the sensor stops the gas supply too soon. This happens if the thermocouple is not hot enough. Check if the pilot flame touches the thermocouple tip. Adjust the flame size if needed. A bent or dirty thermocouple can cause this problem. Cleaning or replacing the part usually solves it.
Credit: www.airoxnigen.com
Tools Needed For Troubleshooting
Troubleshooting a patio heater thermocouple needs the right tools. These tools help you check and fix problems safely and easily. Having them ready saves time and avoids mistakes.
Below are the main tools you need to troubleshoot your patio heater thermocouple effectively.
Multimeter
A multimeter measures voltage, current, and resistance. It helps check if the thermocouple produces the right voltage. This tool shows if the thermocouple works or if it needs replacing. Choose a multimeter that is easy to use and has clear readings.
Screwdrivers
Screwdrivers help open the heater’s cover and remove parts. You need both flathead and Phillips screwdrivers. Using the right screwdriver prevents damage to screws and parts. Keep them handy to access the thermocouple quickly.
Cleaning Supplies
Cleaning supplies remove dirt and debris from the thermocouple and burner. Use a soft brush or cloth to clean gently. Avoid harsh chemicals that can harm metal parts. Clean parts improve heater performance and safety.
Checking The Thermocouple
Checking the thermocouple is a key step in fixing patio heater issues. The thermocouple acts as a safety device. It senses heat from the pilot light. If it does not work, the heater may not stay on. Simple checks can help find the problem. These checks include looking for damage, testing electrical flow, and measuring voltage.
Inspecting For Damage
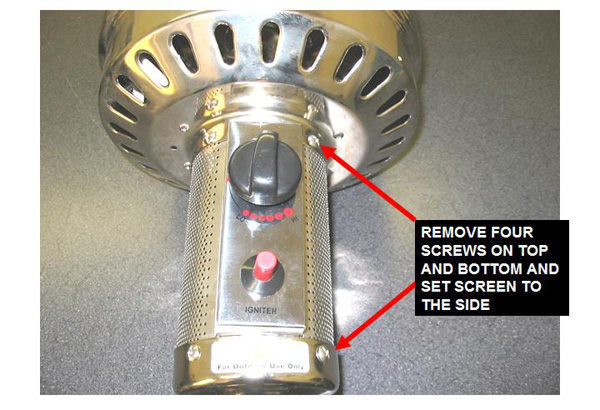
Start by closely examining the thermocouple. Look for any cracks, bends, or burns. Check the tip that touches the flame. Dirt or soot can block heat sensing. Clean it gently if dirty. Also, make sure the thermocouple is tightly connected to the heater. Loose fittings can cause failure.
Testing Continuity
Use a multimeter to test continuity. This shows if the thermocouple wire is broken inside. Set the meter to the continuity setting. Touch the probes to each end of the thermocouple. A beep or low resistance means good continuity. No sound or high resistance means the thermocouple may be faulty.
Measuring Millivolts Output
Measure the millivolts generated by the thermocouple. This test checks if it produces enough voltage to keep the valve open. Use a multimeter set to millivolts. Heat the thermocouple tip with a lighter or match. The meter should show at least 20 millivolts. Less voltage means the thermocouple needs replacement.
Credit: www.afisionarte.com
Cleaning The Thermocouple
Cleaning the thermocouple is a key step in fixing patio heater problems. Dirt and grime can stop it from working well. A clean thermocouple helps the heater light and stay on safely. This process is simple and can save you time and money.
Use gentle methods to clean the thermocouple. Avoid harsh tools or chemicals that cause harm. Keep the part dry and handle it with care. Follow these steps to clean your patio heater’s thermocouple properly.
Removing Dirt And Debris
Start by turning off the heater and letting it cool. Use a soft brush or cloth to wipe away dust. Dirt can block the thermocouple from sensing heat. Remove any cobwebs, soot, or loose particles gently. Cleaning this area clears the path for proper heat detection.
Using Fine Sandpaper
Lightly rub the thermocouple tip with fine sandpaper. Use grit around 400 to 600 for best results. This removes built-up oxidation that stops good contact. Sand just enough to see shiny metal underneath. Too much sanding can damage the part.
Avoiding Damage During Cleaning
Handle the thermocouple carefully to prevent bending or breaking. Do not use water or liquid cleaners on the tip. Avoid using rough tools like wire brushes or knives. Keep the tip dry and free from oil or grease. Clean slowly and gently for best results.
Adjusting Thermocouple Position
Adjusting the thermocouple position is a key step in fixing patio heater issues. A thermocouple senses heat from the pilot flame. It helps the heater know when to stay on. If the thermocouple is out of place, the heater may not work well. Small changes in its position can make a big difference.
Careful adjustments ensure the heater runs safely and smoothly. Follow simple tips to place the thermocouple correctly. This prevents common problems and keeps your patio warm.
Proper Placement Near Pilot Flame
The thermocouple must sit close to the pilot flame. It should touch the flame, but not block it. The tip of the thermocouple needs heat to detect the flame. Place it about half an inch inside the flame. Too far away, and it will not sense heat. Too deep, and it may burn out quickly.
Securing Connections
Check the thermocouple connections for tightness. Loose wires or screws can cause failure. Use a wrench to gently tighten the nut on the thermocouple. Avoid over-tightening, which can damage threads. Clean any dirt or rust on the connection points. Good contact helps the heater work reliably.
Avoiding Loose Fittings
Loose fittings cause gas leaks or poor sensing. Make sure the thermocouple is firmly attached to the burner. Wiggle it slightly to test for movement. Tighten any loose parts with the right tools. Replace worn or damaged fittings immediately. Secure fittings prevent safety hazards and keep heat steady.

Credit: www.shopcarpetplus.com
Replacing The Thermocouple
Replacing the thermocouple in your patio heater can restore safe and efficient operation. This small part controls the gas flow by sensing the pilot flame. A faulty thermocouple often causes the heater to shut off unexpectedly. Swapping it out is a simple task that saves money on repairs. Follow the steps carefully to avoid damage or leaks. Proper replacement ensures your heater works reliably through cold nights.
Choosing The Right Replacement
Select a thermocouple that matches your heater model. Check the length and connection type before buying. Using the wrong part can cause poor performance or safety risks. Look for parts labeled for outdoor patio heaters. Quality matters more than price. Avoid cheap copies that may fail quickly. When in doubt, consult your heater’s manual or a professional.
Step-by-step Replacement Guide
First, turn off the gas supply to the heater. Allow the heater to cool completely. Remove the access panel to find the old thermocouple. Unscrew the connection at the gas valve carefully. Take out the thermocouple from the pilot assembly. Insert the new thermocouple in the same position. Tighten the screws securely but do not over-tighten. Replace the access panel and open the gas supply slowly.
Testing After Replacement
Light the pilot following your heater’s instructions. Watch the flame to ensure it stays lit steadily. If the flame goes out, check the thermocouple connection again. Use a multimeter to test the thermocouple’s voltage if needed. A good thermocouple usually produces about 25-30 millivolts. Confirm there are no gas leaks by applying soapy water on connections. Bubbles indicate a leak. Fix leaks before using the heater fully.
Preventive Maintenance Tips
Preventive maintenance helps keep your patio heater thermocouple working well. Small steps can stop big problems. Regular care saves time and money. It also makes the heater safer to use. Follow these tips to keep your heater in top shape all season.
Regular Cleaning Schedule
Dust and dirt can block the thermocouple. Clean the heater every week or after heavy use. Use a soft brush or cloth to remove debris. Avoid using water directly on the thermocouple. Keep the parts dry and free of buildup. Clean connections help the heater work correctly.
Protecting From Weather Elements
Rain, snow, and wind can damage the thermocouple. Store the heater under cover or use a weatherproof cover. Avoid leaving the heater outside during storms. Moisture can cause rust and electrical issues. Protecting the heater extends its life and function.
Routine Function Checks
Test the heater regularly to spot problems early. Check if the flame lights easily and stays steady. Listen for unusual sounds or smells. Inspect the thermocouple for visible damage or wear. Fix small issues before they become big problems. Regular checks keep your heater safe and reliable.
Frequently Asked Questions
What Causes A Patio Heater Thermocouple To Fail?
A thermocouple can fail due to dirt buildup, corrosion, or physical damage. Poor connections also lead to failure. Regular cleaning and inspection prevent most issues.
How Do I Test A Patio Heater Thermocouple?
Use a multimeter to check continuity and voltage output. A faulty thermocouple shows no voltage or inconsistent readings. Testing ensures accurate diagnosis before replacement.
Can I Fix A Broken Patio Heater Thermocouple Myself?
Yes, minor issues like dirt or loose connections can be fixed at home. However, replace the thermocouple if it’s damaged or worn out. Always follow safety precautions when working with gas heaters.
Why Won’t My Patio Heater Stay Lit Despite A New Thermocouple?
Improper thermocouple installation or gas supply issues may cause this. Check for correct positioning and clean gas lines. Also, ensure the pilot flame properly contacts the thermocouple.
Conclusion
Fixing a patio heater thermocouple can be simple. Check for dirt or loose connections first. Replace the thermocouple if it looks worn out. Keep your heater clean and well-maintained. This helps avoid future problems and keeps you warm. Small steps can make your heater work safely again.
Stay patient and follow the troubleshooting tips carefully. Enjoy your patio heater without worries.